Uncategorized

20 Tools A Homeowner Should Have

1. Philips screwdriver. A Philips or X-shape screwdriver is probably one of the most common tools in any toolbox. If you have a have a handle that accepts interchangeable tips, you can cover a wide range of screw types and sizes.

2. Flathead screwdriver. A flathead or straight screwdriver is invaluable; most light switch plates use straight screws, for example. Having the right size flathead can make a difference, so start with at least a set of three (small, medium and large) to be able to handle most jobs.

3. Tape measure. Your tape measure is indispensable for estimating material quantities, figuring out placement of objects, and calculating floor plans and furniture sizes. It’s always a good idea to measure more than once to make sure you’ve got it right.

4. Level. Some people are good at eyeballing whether something is level or not, but this tool takes all the guesswork away. It takes only a slight error to make objects look off-kilter.

5. Utility knife. From cutting paint around windows that are stuck closed to opening boxes, scoring drywall or even trimming the edges of carpet, the uses are so many that you’ll be surprised how you ever got by without one.

6. Hammer. Pounding nails, pulling nails, crowbar action, tapping things into place — it almost goes without saying why you need hammer. An expensive hammer is long and lightweight; its leverage can assist you when you take that wall down.

7. Putty knife. A putty knife is great for scraping dry glues and paints and for spreading putty, paste and spackle. Having a 1½-inch size for scraping and a 5- or 6-inch one for spreading is helpful.

8. Nail set. A nail set is used for sinking nail heads below the surface of the wood, so that you can then fill the hole with wood putty and sand it, to make the nail disappear. This way the hammer never has to make an ugly dent in the surface you are pounding.

9. Combination square. This multi-use tool can verify 90- and 45-degree angles for miter cuts, measure depths and short distances, and is great for scribing a straight line. It also has a vial to make sure your project is level or plumb.

10. Pliers. The serrated jaws of pliers assist with holding objects firmly, as well as with pulling, pinching or bending metal.

11. Adjustable crescent wrench. There is a screw built into the head of this wrench; turning it adjusts the size of the opening, so that it fits onto most any hexagonal nut. Turning a nut with pliers just strips the edges, making it harder and harder to get a good grip when tightening or loosening it.

12. Wire stripper. This wire stripper has a blade for cutting wire to the proper length and several notches for scoring the insulation around wires of varying sizes, which can then be pulled off. Wire has to be exposed without the plastic coating to make electrical connections.

13. Hex key tool (or Allen key). Some screws, especially bicycles and assemble-it-yourself furniture for which a flush screw is necessary, use hexagonal sockets. Multiple hex key sizes can be purchased separately and the leverage on these is better, but a jackknife-style set such as this provides everything you need in one tool.

14. Power drill. Drilling implies creating holes, and a power drill is the ultimate luxury when tired hands have turned too many screws. It adapts not only to drill bits to bore holes, but also to every kind of screw-head bit, making larger projects go quickly and with less muscle. Just be careful to stop when the fastener is tight so you don’t strip the screw head. Don’t skimp on this tool — you will appreciate having a lot of power.

15. Electrical cord. A rugged, well-insulated indoor-outdoor power cord for high-amp tools will help you extend the limited cord of your tools to your job site — and it’s suitable for yard work too.

16. C-clamp. This tool can hold pieces of wood, metal, or plastic together when you need to glue, saw or file them. Use a thin shim between the clamp and the object you are working on so the clamp doesn’t mar the surface.

17. Flashlight. Necessary repairs can happen in dark, cramped spaces and even when the power is out. Plus, everyone loves to help by holding the flashlight for you. They don’t work without batteries, so have extras on hand.

18. Ladder or step stool. Painting, reaching the light bulb, changing fixtures, trimming the hedge, stringing lights, getting into the attic and many more activities require the aid of a ladder.

19. Broom and dustpan. When projects get messy, save your household broom from harsh debris by having a dedicated set.

20. Music. Every job is made easier with music or talk radio. This is why hardware stores sell radios, although those are more rugged, with rechargeable battery packs that can also be used in your cordless tools. More rugged means when you drop your hammer on it, you just pick it up and get back to work.

Uncategorized

Remove Scuff Marks From Wood Furniture

Scuff marks happen when rubber is pressed and then slid across a surface. Scuff marks are common on the floors of sports arenas because rubber soled shoes are constantly dragging on the surface. In your home, scuff marks occur on wooden furniture if someone kicks it or slides a rubber mat or a tray with rubber pads on it across the furniture. Use products that won’t damage wood floors to remove these scuff marks.

Step 1

Rub a tennis ball over the scuff mark using heavy pressure. The scuff mark should transfer from the furniture to your tennis ball. Rotate the ball and continue rubbing until the scuff mark is gone or until you can’t remove any more of it.

Step 2

Rub an eraser over the scuff mark. Erasers are often all you need to remove the mark residue, but they may not work on dark stains or stains that have been on the wood furniture for a long time.

Step 3

Spray an all purpose cleaner on a terry cloth. Terry cloths have a raised nap that will help work away stains without scratching furniture or damaging the finish. Rub the cleaner into the wood furniture with the terry cloth until the scuff mark is gone.

Uncategorized

Kitchen Hack

De-skin potatoes without a peeler

Time to ditch the peeler again! Peel a potato in a snap by boiling it and then giving it an ice bath. The skin will separate from the potatoey center and you can pick it right off.

Uncategorized

Efficiency vs. Studio Apartment

Real estate listings can be very confusing, with terminology that requires a bit of translation. “Cozy” translates to small, “adjacent to” means within a mile or two and “transitional neighborhood” is a neighborhood that only a few years ago was one to avoid. Another set of terms that can cause confusion is “studio apartment” and “efficiency apartment.” The fact that many agents and landlords use them interchangeably does not help. However, some concrete features differentiate the two.

 Size

Both studios and efficiencies are typically small apartments meant for occupancy by a single person. They are designed to be basic and inexpensive. For many renters and buyers, these apartments are an affordable way to get into a convenient or upscale location.

Efficiencies

Efficiency apartments, also called bachelor apartments, are always small and feature a combined living and sleeping space. Most efficiency apartments are one room with a separate bathroom. Efficiencies have a kitchenette area attached to the living area. A wall of appliances and counter space is a common setup. The appliances are often smaller than usual, such as a half fridge, a one or two burner stove and a small sink with a small counter area and are more for heating food than cooking full meals.

Studios

Studio apartments are not always small, but are always one room that combines the living and sleeping spaces. Some studios may have an alcove area for sleeping or a loft area that is open to the main room. They feature a separate bath and kitchen with full size appliances.

Loft Studios

Another type of studio is the loft studio. This type of studio is a single room with high ceilings and often features industrial elements such as exposed beams or ductwork and large windows. These studios can be quite large, especially in converted spaces. They may have a distinct kitchen area with full size appliances that are incorporated into the single open space and an enclosed or separate bathroom. There may be an open, raised loft area over the kitchen and bath that can be used as a sleeping area.

Considerations

Both apartment styles are highly functional and require some specialized furniture placement and decoration in order to achieve delineated spaces. Storage is usually at a premium in these units and furniture items often have to perform multiple functions to accommodate storage needs. Privacy can be an issue if there are guests.

Uncategorized

How to Meet Your New Neighbors After Moving

Just because you have an opportunity to meet your new neighbors after you move into the neighborhood, doesn’t necessarily make it easier to do. But getting to know your neighbors will help you feel like you’re at home and settled into your new space.

Careful Observation

Check out your neighborhood, noting those who seem to have kids (toys out front, loud screams from the backyard and parents frantically trying to get small people into a van along with sports equipment), those who are elderly, those who seem to be always in the garden or even those who only seem to come out at night (although they’re more difficult to meet, unless you are also a night owl).

If you can find some common interest- you both have kids, your mother is elderly, or a friend talks about her garden a lot even if you don’t possess a green thumb – this will make it much easier to approach the person.

The key in careful observation is to not to be obvious about it nor act stalker-ish. Some people may feel a little strange if you seem to know too much about them.

Take a Walk

A great way to meet your new neighbors is to spend time outdoors, in your garden or by taking a walk around the block. If you have a front porch, use it.  You’ll be surprised how easy it is to meet people when they approach you first. Make sure you spend time outside after work hours or on weekends.

Make Your Move

We all have busy lives, so make sure you only approach your neighbor when it seems like it might be a good time. Avoid dinner, breakfast and early mornings (unless they’re already up and outside) and when they’re getting in their car.

Usually, if someone is leaving or coming home, they have an agenda and plan and don’t necessarily appreciate the interruption.

What to Say

If you go back to what you noticed about your neighbor, you can start there. So if you see your neighbor scrambling into her van with two girls in tow, one with a baseball glove and the other in a tutu, then you could approach your neighbor and ask about community softball for your child or where your child might take ballet lessons.

Just remember that your neighbor might be in a hurry so leave your number or ask them to drop by sometime.

What if You Have Nothing in Common?

No problem. There’s absolutely nothing wrong with just walking up to the front door, and introducing yourself or inviting them to a small get together.  Let them know you just moved in and where you moved from. If that still feels uncomfortable, then ask about garbage pickup or recycling centers in the neighborhood. Remember, while you think you might not have anything in common, you do: you live on the same street, in the same neighborhood. That’s enough to start any conversation.

Host a Get-together

While it might be the last thing you want to do while you’re still unpacking, hosting a casual get-together is a great way to meet your neighbors all at the same time. If the weather is nice, host it outside. Ask people to bring snacks or drinks or chairs or all three. Everyone know you’ve just moved in and won’t expect much, plus they’ll want to help out.

Be Friendly, But Not Invasive

I had a neighbor once who introduced himself, then misconstrued my friendliness to be a sign that I wanted an extended conversation. I didn’t, and I tried to avoid him from then on simply because I was always afraid of “getting caught” in a lengthy discussion.

Uncategorized

Product of the Week

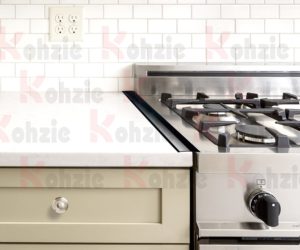
Kohzie Stove Counter Gap Cover

Silicone BLACK MATTE (Set of 2) Stove Gap, Gap cap for stoves – Seals the Gaps Between Appliances and Furniture

Item Description:

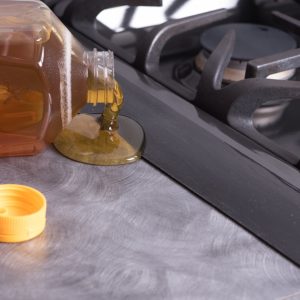
STOP FEEDING RODENTS AND INSECTS AT YOUR KITCHEN – AVOID DIRT IN HARD-TO-REACH AREAS WITH THIS STOVE COUNTER GAP COVER! Are you tired of dropping pieces of food in the gap between the countertop and stove? Do you want to say goodbye to insects and dirt in these hard-to-reach spaces? The Kohzie Stove Counter Gap Cover is here to assist you! Eliminate the annoying “Stove Gap” in your kitchen. Used also as stove counter gap covers, counter gap, range extender, stove gap filler, stove gap black • This stove and counter gap cover is made of 100% food-grade silicone, resists temperatures between -40F to 446F (-40C to 230C). Doesn’t warp or melt! • Whether it’s about even or uneven surfaces, our gap cap for stove will adhere to any surface, staying flat and providing great coverage to finally stop food or dirty reaching in that annoying gap! • Easy to clean: say goodbye to fancy cleaning agents! You’ll need just a damp cloth to clean the Kohzie Stove Counter Gap Cover, so you won’t be required to make a huge effort! • The cover is dishwasher-safe, you can always throw it in your dishwasher and have it cleaned without any effort at all! • Our stove counter gap cover will nicely fit in any kitchen, giving it a sense of functionality that competing products simply can’t achieve. • Use it to cover any gaps in your kitchen! Place it atop the space between your counter top and dishwasher/stove/or any other appliance to prevent dirtying hard-to-reach areas. Make your kitchen a cleaner and functional place with the Kohzie Stove Counter Gap Cover! CLICK HERE to BUY!!

Uncategorized

How to Clean Mini-Blinds

Oh, mini-blinds-window those things with the narrow slats do look good, all right, when they’re clean. They are so much classier than big Venetian blinds. But they’re even harder to clean. They attract dust, dirt, grease, pollen and everything else. Delay cleaning them long enough, and they’ll change colors right before your eyes!

Mini-Blind Cleaning Gadgets?

There are a lot of gimmicks out there for doing dry runs on the shades – everything from tiny feather dusters to little chamois’-on-a-stick. Probably the easiest way to dust them is to extend them full-length, close them, and run the vacuum cleaner brush over them (assuming you don’t have one of those super-power cleaners that can suck the blinds right off the windows). Then rotate the slats in the other direction and vacuum again.

Cleaning Mini Blinds Yourself

To wash the blinds, you’ll have to take them off the wall, remove the adjusting rod, and carry them into the bathroom. Before taking them down from the window, raise them to the top position and lock them there. Locking the slats in an “up” position saves you the difficulties of walking through the house holding a blind flapping around like a frightened linguini.

Cleaning in The Bath Tub

Your tools:

Grease-cutting dish detergent, heavy cloth gloves or old washcloths; large, old towels spread out on the floor, and fabric softener sheets.

The Cleaning Process:

Place the blind in the bathtub and then extend it to its full length. Slats should be only partially closed, either up or down. Cover the blind with warm water and a generous amount of detergent. Let them soak for at least 5 minutes. Alternative cleaning solutions include a 1-to-1 solution of water and ammonia or baking soda or borax. For particularly grimy blinds, add degreaser or pine oil to the bath.

Put on your cloth gloves (or pickup your rags), saturate them in the bath water, and then wash each slat by running your fingers along it and cleaning both sides of each slat at the same time. When you’re done, drain the water if it’s dirty. If not, keep it for the next set of blinds. Remove the blind from the water and, holding it up, rinse the blind well with the shower. It really helps here to have one of those shower extension heads. Turn off the water, let the blind drip a bit, and put it on a towel. Blot it dry with a second towel.

Additional Cleaning Tips

Spray the dry blinds with a liquid fabric softener or run softener sheets across the slats to enable the blinds to resist dust, dirt, and hair. Re-hang.

Weather permitting, you might prefer to clean the mini-blinds outdoors. Outdoor tools include a garden hose, some kind of line on which you can hang the wet blinds, a sponge and bucket for the water and detergent. You’ll wash and rinse them with the hose, then, instead of toweling them off, hang them up to dry.

No matter whether you wash them inside or outside, you will notice when you re-hang the blinds that they’re still not perfectly clean. You’ve just gotten the “easy” dirt off. Moreover, some of the slats will stick together and must be separated and dried with a dry rag or paper towel. Using yet another set of dry cotton gloves, run your fingers down the slats after applying a spray cleaner such as 409 to get the last bits of dirt.

Some people avoid soaking their hands in detergent when washing; instead of using a cotton glove, they slip on a rubber glove and an old sock over that, and clean the slats with the sock. Still others don’t bother with tubs or water at all, and wipe the slats down with rubbing alcohol while the blinds are still hanging in their usual places. Here, too, gloves or old socks can be used.

Another warm-weather alternative, if you’ve got a van or truck, is to load the blinds up and take them to a self-serve carwash, line them up on the floor, and use the car brush to apply detergent and rinse them off. Final light waxing is up to you. Towel off the excess water, load them back up, take them home, and hang them to dry in the back yard.

Uncategorized

How to Get the Smell Of Smoking Out of Your House

The smell of smoke and nicotine can stick to interior walls, window screens, and household linens and carpets, creating an unpleasant smell throughout the home. Smoke odors are caused by leftover resin and tar, which can be difficult to deodorize. Removing smoke odors from your home may require a total cleaning of the house, purifying the air, and even replacing carpets and paint if the smoke damage is particularly extensive

Preparing to Deodorize Your Home

1- Remove all sources of smoke. Remove cigarette butts, ends of cigars, ashtrays, etc. from your home and outside space. Leaving these items in your home will lead to continual absorption of the smell of smoke. Dispose of these items after they have been completely extinguished. Place them in a grocery bag and tie it closed before putting it in an outdoor trash bin.

2- Open all windows and doors to air out the house. Do this frequently throughout the cleaning and deodorizing process.

-You can place fans strategically throughout your home for increased airflow. Point your fans in corners of the room that may not have good airflow to push air out of the room. Or, point fans toward doorways and windows to help stale air leave the home.

3- Purchase deodorizing products. Some products will advertise things such as odor control or odor removal. However, it’s important you use products that have a cleaning agent included. Products that simply mask odors will not get rid of the smell of smoke. Look for products that have:

-Baking soda. Baking soda naturally neutralizes odors and does it by bringing acidic and basic odor molecules into a more neutral pH or state.

-Activated charcoal. Charcoal is used often to filter dirt and particles from water but it also acts as a great deodorizing agent that absorbs odors and smells.

-Hydrogen peroxide. Hydrogen peroxide deodorizes by giving oxygen to a contaminated or smelly area. However, this chemical can act like bleach and should be used carefully and only on certain surfaces. Do a test run on a small area before using it extensively?

Removing Odors from Carpets, Cloth, and Linens

1- Gather all your clothing, duvets, pillows, and curtains. Anything that is cloth or linen and can be washable should be gathered into bags to be washed.

You may think a certain item doesn’t smell, but you may have gone nose blind to it. This means you have gotten used to the smell of smoke and can’t distinguish it from the environment anymore. It’s safe to say that if something in a home smells of smoke, most or all items will probably smell like smoke.

Wash or dry clean all items. It’s important to clean your clothes as well as cloths, linens, and pillows before you plan to clean the rest of the home. Cloths and linens are able to soak up odors more effectively than other types of materials. By getting them out of the way, it makes cleaning other surfaces easier.

Consider washing and storing your clean cloths and linens outside of the home. Bringing them back into the home after cleaning runs the risk of your items soaking up smoke odors left in the home.

2- Remember to clean, wash, or replace your curtains and shades. Many people forget to clean curtains and shades which are prime spots for tar and resin to settle and permeate into. Take down your curtains or shades and wash them. You can also buy new shades if yours are particularly old and smelly.

Certain wall hangings may also be made of fabric or canvas material. Remember to take these down as well and clean them with mild soap, water, and a wash cloth. Simply wipe them down and store them outside of the home until you finish the deodorizing process.

3- Survey your carpet. If it is extremely dirty and the smoke smell is intense, consider replacing it. If you cannot, clean it by:

-Shampooing it. You can rent a carpet steam cleaner and shampoo the carpet yourself. Or you can hire a professional to clean the carpet for you.

-Sprinkling baking soda. Sprinkle a liberal amount of baking soda on top of your carpet surfaces and leave it to soak for a day. The baking soda will absorb the smell of smoke and any moisture in the carpet. Then vacuum the carpet to remove the baking soda. You can do this several times a week until the smell disappears.

4- Sprinkle your fabric-covered furniture and carpets with baking soda. You may also choose to use a strong chemical cleaner. This deodorizing product is used by professionals who are trying to improve houses after a fire.

If you can remove the cushion covers, wet them and wash by hand or in a washing machine with a baking soda mixture. Let them dry a little, then place them back on the cushions when they are still slightly wet. This allows them to stretch to the appropriate size without causing mildew.

Removing Smoke Odor from Household Surfaces

1- Use vinegar or diluted bleach to clean non-fabric surfaces. Bleach, and especially vinegar, do well to break up the tars and resins in cigarette smoke. The smell of bleach and vinegar may be off putting at first, but unlike smoke, these odors will dissipate in time.

Mix equal parts of white distilled vinegar and warm water to create a cleaning solution.

Mix 1/2 cup (115 mL) of chlorine bleach to 1 gallon (4 L) of water to clean surfaces like sinks, showers, bathtubs, countertops, glazed tile, vinyl, and floors. Always rinse surfaces with water thoroughly after cleaning, before use. Do not use bleach on the same surface that you applied the vinegar mixture to

2- Wash the floors, ceilings, window screens, walls, and other fixtures. You may need a ladder to reach all the washable surfaces in your house.

Don’t forget to wash down interiors of closets and cabinets as well as the walls of the basements, hallways, cupboards, and drawers.

3- Wipe all the wood, plastic, and metal furniture and appliances with distilled white vinegar. Put the vinegar in a spray bottle and wipe it clean with a rag. Follow up by rinsing with water and drying with a clean rag, if the furniture is delicate.

Place several drops of lavender, citrus, or rosemary essential oil to offset the smell of the vinegar. If you do not choose to do this, the vinegar smell will dissipate as it deodorizes furniture.

4-Dust or rinse all your Knick knacks. Simply wipe them or wash them in mild soap. You may want to remove them from the home until all surfaces are clean and deodorized.

Repainting the Walls

1- Wash your walls. You can use a variety of products or cleaning solutions to wash your walls and remove dirt, grease, and odors.

Most professional painters use TSP, or trisodium phosphate, to clean walls Just mix 1 cup of TSP to 20 cups of water or buy a TSP spray to apply to your walls and wipe with a washcloth. Be sure to use gloves when you’re using TSP.

2- Use a deodorizing primer on washed walls. Products like Zinsser Bullseye and Kilz are an essential step to removing smoke odors that have been around for a long period of time. Simple repainting will not remove the smell and will just trap smoke odors within the paint.

3-Consider painting other parts of your home. For example, if an old piece of furniture smells smoky, you can wash it, prime it with a deodorizing primer, and paint it to get rid of the smell.

Purifying the Air

1-Replace your air filters, furnace filters, and air conditioning filters. Air that is forced through your home will still contain smoky smells, so replacing any and all filters will begin to purify the air and move clean, fresh air into the home.

You can clean filters in TSP solutions. While wearing gloves, simply soak the filter in a TSP solution and agitate it for no more than an hour. Use a brush to further rid of any dirt or remaining odors. Rinse thoroughly after cleaning.

2-Buy an air purifier. You can choose to install an air purifier in your home’s forced air system or you can buy purifiers that can be placed in a single room. Make sure to take into consideration the size of the room or home, and purchase equipment that is the right size and strength for the area.

3-Place bowls of activated charcoal around the house. Activated charcoal works to absorb odors over time. Place bowls of charcoal around places within your home that cannot be aired out, such as a windowless room or cupboard space. Over time, the charcoal should soak up the odors.